iOS Apps, Amazon Webservices, HTML, CSS, Javascript, PHP

Latest

Configuring FTP on EC2 Ubuntu

Step 1: Enable security group

Login into AWS management console and Click Security Groups under NETWORK & SECURITY.

Select our security group that we used while launching EC2 instance.

At the bottom of the page we will see the details of security group, in inbound tab.

Enter port 20 and 21 in port number text box and say Add Rule for each port. The rule will come on right hand side plane.

Enter range 12000 – 12100, 40000-41000, 49152 – 65534 and 1023, 1024

To apply rule change click Apply Rule Change button below.

Now, all the instances with this security group will now possess the new behavior.

Step 2: Install vsftpd

Install vsftpd with the below command

$apt-get update

$apt-get install vsftpd

At this point, vsftpd is started with access to anonymous users.

Step 3: Configure vsftpd

Open the configuration file for editing

$ vi /etc/vsftpd.conf

Modify the below lines in the file.

vsftpd allowed anonymous, unidentified users to access the server’s files. If we want to restrict this type of access we have make this option as NO

anonymous_enable=NO

Uncomment the local_enable option, changing it to yes and, additionally, allow the user to write to the directory

local_enable=YES

write_enable=YES

The below lines makes all the local users to be jailed within their chroot and will be denied access to any other part of the server

Chroot_local_user=YES

Add these lines at the bottom of the file.

pasv_max_port=41000

pasv_min_port=40000

port_enable=YES

pasv_enable=YES

Save and Exit the file. Because of a recent vsftpd upgrade, vsftpd is “refusing to run with writable root inside chroot”.  The bug is resolved in version 3.0.0 which is not part of Debian wheezy:

We can easily install the package by the following sniplet

echo “deb http://ftp.cyconet.org/debian wheezy-updates main non-free contrib” >> \ /etc/apt/sources.list.d/wheezy-updates.cyconet.list; \ aptitude update; aptitude install -t wheezy-updates debian-cyconet-archive-keyring vsftpd && \ echo “allow_writeable_chroot=YES” >> /etc/vsftpd.conf && /etc/init.d/vsftpd restart

At this point, vsftpd is restarted and is ready to use.

Step 4: Creating Users

Here we create a sample users which will be having permissions for uploading/downloading files within their own directory.

Create user in unix with belew command

$useradd <username>

Set its password

$passwd <username>

Create home directory for this user.

$mkdir /home/<username>

Change directory  ownership to this user

$chown <username>: <username> /home/<username>/

Follow the same steps for other users also.

At this point we are ready to use FTP.

Step 5: Access the FTP server

We use filezilla a FTP client to upload/download the files.

Mention Elastic IP of our server in Host text box, enter username, password and port as 21

How to install LAMP on EC2 Ubuntu with phpmyadmin in 4 mins

After you start your AWS EC2 Ubuntu 9.10 Karmic Koala server in 6 mins, if you had to install a full LAMP (Apache PHP and Mysql) stack here is how you do it in under 4 minutes:

Start your command line and execute a command similar to below with your own keypair and Public EC2 DNS name:

Harry-MacBook-/User/Harry/ec2 $ ssh -i id_rsa-ubuntu ubuntu@ec2-185-77-129-63.compute-1.amazonaws.com

Once you are in then type in:

sudo aptitude update && sudo aptitude dist-upgrade

It will ask you for your password and it will ask you if you want to continue with the updates. Type Y and press enter.

It will install a bunch of updates and in a short while it will be done.

At that point you need to execute:

sudo reboot

This will reboot your EC2 instance and you will have to wait less than a minute before you execute your request.

Now we will install Apache, PHP and MySql using the following:

sudo aptitude install apache2 php5-mysql libapache2-mod-php5 mysql-server

During the install it will ask you for a MySql root password. Set it to something you remember just don’t leave it blank.

Test out your webserver by going to the browser and entering the public IP in the browser.

How do you know what is your public IP on EC2? It’s very easy. If you logged into the server using the public DNS ec2-185-77-129-63.compute-1.amazonaws.com, then your IP is 185.77.129.63. So go to your favorite web browser by typing in http://185.77.129.63{as an example in my case}. A page should come up which says “It works”. This is how you know Apache is working.

How do you know if php is working?
Well, you need to try a test php file on your server. For that execute the following on your command prompt:

cd /var/www

– This will take you into the web root.

Here execute the following:

vi test.php

press i at the prompt for inserting and enter the following:

press escape on your keyboard then :wq!. This will save a test.php with the above content.

Now go back to your browser and type in http://185.77.129.63/test.php

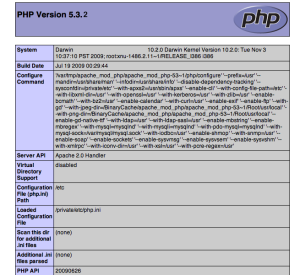
You should see a page similar to below:

php-info-screenshot

php_info

But now how do we know if MySql is up and running for our website?

This is why we need phpMyAdmin. Here is how you install that:

sudo apt-get install phpmyadmin

Say yes to continue. And voila, its installed in a jiffy!

What is phpMyAdmin? It is a php based interface to your mysql server.

How do you test it? Well lets head back to the browser and type in the following:

http://185.77.129.63/phpmyadmin

And a page like this should show up:

phpMyadmin-screenshot

phpmyadmin_info

Wow that is great!!! Now how do you get in?

Use the user name: root
And remember the password you had set while installing MySql above? Use that for the password and you are in. You can now create databases and tables using a web user interface.

We need to do one more thing given that we have put our EC2 server up on the web as a web server which also has a database server. We need to security harden it. How to do this? Ubuntu makes it very easy for us.

sudo ufw enable

– This enables the Uncomplicated Firewall built-in to Ubuntu

sudo ufw allow 22

– This keeps the SSH port open

sudo ufw allow 80

– This keeps the Web Server Default port open

iOS 5 Twitter framework example

Since iOS 5 includes a Twitter framework, sending tweets is awfully easy. For this to work, the device obviously needs to be running iOS 5.0+ and it’s best if the device has been logged into the Twitter service (Settings > Twitter > sign in). The user is able to give or remove permission for listed applications to you your Twitter account. No authorization is required from your project now… it’s done at the OS-level if the user wants it.

So in your project, add the Twitter.framework. Include it in your class (#import <Twitter/Twitter.h>) and when you want to send a Tweet, it’s as easy as this (I am using ARC):

1
2
3
4
5
6
7
8
9
10
11
12
13
14
15
16
17
18
19
20
21
22
23
24
25
26
27
28
29
30
31
32
33
TWTweetComposeViewController *twitter = [[TWTweetComposeViewController alloc] init];
[twitter setInitialText:@"Enter tweet here"];//optional
[twitter addImage:[UIImage imageNamed:@"emailIcon.png"]];
[twitter addURL:[NSURL URLWithString:[NSString stringWithString:@"http://www.apple.com"]]];
if([TWTweetComposeViewController canSendTweet]){
           [self presentViewController:twitter animated:YES completion:nil];
        } else {
            UIAlertView* alertView = [[UIAlertView alloc] initWithTitle:@"Unable to tweet"
                                                                message:@"You might be in Airplane Mode or not have service. Try again later."
                                                               delegate:self cancelButtonTitle:@"OK"
                                                      otherButtonTitles:nil];
            [alertView show];
            return;
}
twitter.completionHandler = ^(TWTweetComposeViewControllerResult res) {
    if (TWTweetComposeViewControllerResultDone) {
        UIAlertView* alertView = [[UIAlertView alloc] initWithTitle:@"Tweeted"
            message:@"You successfully tweeted"
            delegate:self cancelButtonTitle:@"OK"
            otherButtonTitles:nil];
        [alertView show];
    } else if (TWTweetComposeViewControllerResultCancelled) {
        UIAlertView* alertView = [[UIAlertView alloc] initWithTitle:@"Ooops..."
            message:@"Something went wrong, try again later"
            delegate:self
            cancelButtonTitle:@"OK"
            otherButtonTitles:nil];
        [alertView show];
    }
    [self dismissModalViewControllerAnimated:YES];
};

The user gets a keyboard and a Twitter “dialog” is presented. Really easy (not integrated tightly to your application), but in this way it’s more secure. They have however made it very easy to add Twitter functionality to your application. They can’t change the attached image however (if there is one).

Objective-C: Calling selectors with multiple arguments

In Objective-C, a selector’s signature consists of:

  1. The name of the method (in this case it would be ‘myTest’) (required)
  2. A ‘:’ (colon) following the method name if the method has an input.
  3. A name and ‘:’ for every additional input.

Selectors have no knowledge of:

  1. The input types
  2. The method’s return type.

Here’s a class implementation where performMethodsViaSelectors method performs the other class methods by way of selectors:

@implementation ClassForSelectors
- (void) fooNoInputs {
    NSLog(@"Does nothing");
}
- (void) fooOneIput:(NSString*) first {
    NSLog(@"Logs %@", first);
}
- (void) fooFirstInput:(NSString*) first secondInput:(NSString*) second {
    NSLog(@"Logs %@ then %@", first, second);
}
- (void) performMethodsViaSelectors {
    [self performSelector:@selector(fooNoInputs)];
    [self performSelector:@selector(fooOneInput:) withObject:@"first"];
    [self performSelector:@selector(fooFirstInput:secondInput:) withObject:@"first" withObject:@"second"];
}
@end

The method you want to create a selector for has a single input, so you would create a selector for it like so:

SEL myTestSelector = @selector(myTest:);

How to install provision and .ipa file to iPad and iPhone?

We distribute our iPhone and iPad applications in an .zip or .ipa file to our clients for testing. So we need 2 files:
1. xxxxx.ipa filename extension
2. .mobileprovision profile – to be able to join the ad-hoc group. This second file that contains your device UDID is needed to allow the application to run on your iPad/iPhone.
Once you have got these two files from us, you will need to open iTunes and have your device ready and connected to your computer:

1. Save xxxx_updates.zip to your computer’s local drive or desktop
2. Unzip  xxxx_updates.zip, yo will get both .ipa and .mobileprovision
3. Open the iTunes. Connect your iPhone or iPad.
4. Drag and drop the .mobileprovision file into iTunes in the upper left corner, under the Library section at the Application group. If you receive an error message, we likely sent you a wrong provisioning profile, so let us know it.

OR:

Simply double click .mobileprovision to install
ipa-install-itunes.jpg

5. Drag and drop the .ipa file to the Application folder. In iTunes verify that the program is listed as an application.

OR

Simply double click .ipa file to install

ipad-iphone-install.jpg

6. Synchronize the Application folder with your device and keep it synchronized

iphoneapp_sync_itunes.jpg

7. Drag and drop “Your app” to “iPad screen” on the right side of above screen.
8. Click on Apply.
7. Once installation completed, Find App  on your device, and click on it.

Distribute Ad Hoc Applications Over the Air (OTA)

If you’ve been through the distribution process of an Ad Hoc application, you can appreciate the challenges of getting a build installed on someone’s device. From the differences of working with users on Windows versus Mac machines, to explaining how to import an Ad Hoc provisioning file and the associated build into iTunes, this process is anything but a walk in the park.

In this post I’ll take you through the steps of deploying Ad Hoc builds over-the-air, where users simply point the Safari web-browser (on their iPhone) to a link and tap to install the provisioning file and associated application.

Provisioning Profile

To begin, create a provisioning profile like you would for any other Ad Hoc build. In the image below you’ll notice I created a profile named AdHocOTAProfile and associated this with the app id AdHocOTA.

Once the profile is created, download onto your location machine and drag/drop the file onto the Xcode icon, this will install the provisioning file into the following folder: ~/Library/MobileDevice/Provisioning Profiles. The image below is a screenshot of the profile path on my machine – notice the provisioning file name is no longer the nice readable name that was written to your file system when you downloaded the file, this is to be expected.

From within Xcode, you can now associate this provisioning profile with your build. In the Target settings, select the Build tab, in the Code Signing section choose the new Provisioning Profile you created:

Xcode Build and Archive

Once you have a working project within Xcode (with the Code Signing identity set as mentioned above), make sure that you set the build type to Device.

From the Build menu in Xcode, choose Build and Archive (if this option is not highlighted, make sure you’ve selected Device in the build settings.

Once the build is complete, the Organizer window will appear – make sure the Archived Applications section is selected on the left panel.

In the figure above, I’ve updated the Name of the app to AdHoc OTA Test, this is optional, as well as any comments you would like to include.

Click on the Share button, and a new dialog will appear similar to that shown below:

From the Identity dropdown, select the Provisioning Profile created earlier:

Now choose Distribute for Enterprise – fill in the URL to the location where you plan to host the application. Note that you must include the fullpath to the application, including the name of the .ipa file that you plan to use:

At this point, don’t worry about the image files, I believe those are applicable only if you are doing an OTA deployment through an Enterprise developer account (internal app distribution for corporations). Update: Seems there may be a little more to how the images are used beyond Enterprise deployments, see the comments section for more information.

Once you select Ok, you will be prompted for a filename to save the build, verify that you use the same name as you specified in the URL:

At this point ipa and plist files will be created for you, the provisioning file will be embedded within the ipa.

OTA HTML File

With the build complete, we know need to create a very simple webpage that will allow users to find the application on a web-server.

The html below is as about as bare-bones as we can get, it’s nothing more than a link to the file, with a specific href for itms-services which Safari will recognize and initiate the download/install process when clicked.

<!DOCTYPE HTML PUBLIC "-//W3C//DTD HTML 4.01 Transitional//EN" "http://www.w3.org/TR/html4/loose.dtd"> 
<html>
<head> 
  <title>OTA Test App</title> 
</head> 
<body>
  <ul>
    <li><a href="itms-services://?action=download-manifest&url=http://3SixtySoftware.com/OTAtest/AdHocOTATest.plist"> Tap Here to Install the Application</a>
  </li> 
  </ul> 
</body> </html>

Important: – Replace the path shown above with the path to where you will upload the ipa and plist files that Xcode created.

Save the html file with the extension .html

Upload To Web-Server

We’re getting close – at this point we are ready to upload the ipa, plist and html files. The figure below shows the directory listing on the web-server where I uploaded the files:

Install the iPhone Application OTA

To download the application via OTA, start your web-browser and point it to the link where the html file lives. Once loaded you should see a screen similar to the figure below:

Tap on the link and a dialog will appear asking if you would like to install the Ad Hoc application:

If all works as expected, at this point you can send a link to the html file to anyone you included in the provisioning file and they can install the application OTA.

Show hidden files Mac OS Lion

To enable hidden files/folders in finder windows:

  1. Open Finder
  2. Open the Utilities folder
  3. Open a terminal window
  4. Copy and paste the following line in => defaults write com.apple.Finder AppleShowAllFiles YES
  5. Press return
  6. Now hold ‘alt’ on the keyboard and right click on the Finder icon
  7. Click on Relaunch

You should find you will now be able to see any hidden files or folders. One you are done, perform the steps above however, replace the terminal command in step 4 with => defaults write com.apple.Finder AppleShowAllFiles NO

Notice that the /tmp, /usr, and /var directories now show up in the Finder. You’ll also discover that you can see your Unix “dot files,” such as .bashrc, in the Finder.

So what are the downsides of this trick? Well, you’ll see every hidden file on your system, which means that you’ll see a .DS_Store file in every directory. And by having every file visible, it’s that much easier to make a dumb mistake and accidentally delete one (though the truly important files are system-owned, making it much harder to do something stupid to them). Finally, as you can see in the above screenshot, all of your folder icons (in 10.4, at least) will be dimmed. However, if you work with Unix files a lot, you may find these tradeoffs worth it for the increased ease of use.

If you tire of the dimmed folders and other downsides, just open Terminal and repeat the command, but change YES to NO, then press Return again. You’ll need to relaunch the Finder again, but when you do, everything will be back to normal.

Password Protect a Directory with .htaccess

Protecting files on your website from unauthorized users can be very important. Even more important is the method by which you accomplish this task. You could use PHP to listen for login authorization information on each page, but that doesn’t protect your images, documents, and other media, does it? That’s why I’ve found the .htaccess method of protecting files and directories the most reliable. Oh, and it’s easy too!

The system requires two files — the .htaccess file and .htpasswd file.

The .htaccess Code

copyAuthType Basic AuthName "restricted area" 
AuthUserFile /home/davidwalsh/html/protect-me-dir/.htpasswd 
require valid-user

The above code protects a directory called “protect-me-dir” at root level. The “AuthUserFile” value is always specific to your hosting configuration. If you don’t know what the value should be, do a phpinfo() and find the DOCUMENT_ROOT value.

The .htpasswd Code

copydavidwalsh:daWHfZrDLB88. 
rodstewart:roFulYxC2.8ws 
cssexpert:csmnmq.M8T5ho

The .htpasswd file contains the usernames and passwords of allowed users. One per line. The passwords are MD5’d for security purposes.

To generate encrypted passwords for your .htpasswd file, you can use my .htaccess password generator.

Importing large SQL files through command line when using PHPMyAdmin/XAMPP

This tutorial is on how to import large SQL files when your sql dump file cannot be handled by PHPMyAdmin due to its large file size. Importing large SQL file sizes in PHPMyAdmin will produce an error if maximum file upload size has been reached and sometimes may cause the browser to freeze. You have to import this through the command line.

Here are the simple steps on how to do it.

1. First, let us say that my Mysql.exe is in D:\xampp\mysql\mysql.exe (I’m using XAMPP by the way) . I’m gonna put my large SQL file in that directory also, meaning the path for the SQL file will be D:\xampp\mysql\your_sql_file.sql

2. Create your database in your PhpMyAdmin interface(database name only).

3. Run your command prompt(Start -> Run -> then type “cmd”).

4. Type this in the command line, assuming that your MySQL installation and the SQL file locations are on the paths I had given in Step 1.

D:\xampp\mysql\mysql.exe -u root -p db_name < D:\xampp\mysql\your_sql_file.sql

where “root” is the username of your database and “db_name” is your database name. After the successful command, you will be asked to enter password, enter your password if it has then press Enter or just press Enter if none.

5. Go back to your PHPMyAdmin to check of the SQL dump file has been executed properly.

Parsing XML in an iPhone App Tutorial

This is a tutorial on parsing XML data in your iPhone app. I won’t be explaining things in great detail here because I assume if you are doing XML parsing you have some experience and don’t need to be shown a lot of the basics. At this point you most likely just want to see some code and implement it into your own app. If you have any questions feel free to ask.

Final App Shot

What we will be doing here is calling my Twitter account through a URL and receiving an XML of my status tweets. We’ll then parse that XML and show the tweets in a table view. This really isn’t much different than the way a Web Service will work. We are calling a URL and then receiving some data back. In this case it is Twitter that has done the web service part for us on their servers and they are kind enough to return our data in an XML format. We could be calling a Web Service that we have written on one of our own servers and then parsing the returned XML.

Anyway, here we go.

1.) Create a new Navigation-based Application named XMLParserTutorial. We will be displaying our parsed data in the UITableView.

2.) We need to create a class to hold the individual data after it’s parsed. In this case the data will be a tweet. So we will create a class named Tweet. Right click on Classes, select Add > New File … and choose Objective-C class (Subclass of NSObject) click Next and name it Tweet.

3.) Open up our Tweet header file (Tweet.h) and add two NSStrings. One for the tweet’s actual content and one for the date it was created.

1
2
3
4
5
6
7
8
9
10
11
12
13
14
#import <foundation foundation.h="">
@interface Tweet : NSObject
{
    NSString     *content;
    NSString     *dateCreated;
}
@property (nonatomic, retain) NSString   *content;
@property (nonatomic, retain) NSString   *dateCreated;
@end
</foundation>

4.) Next open up the implementation file Tweet.m and synthesize our variables we just created.

1
2
3
4
5
6
7
#import "Tweet.h"
@implementation Tweet
@synthesize content, dateCreated;
@end

5.) We need to create our XMLParser object. Right click on Classes, select Add > New File … and choose Objective-C class (Subclass of NSObject) click next and name it XMLParser.

6.) Open up XMLParser.h. Import Tweet.h and implement the NSXMLParserDelegate protocol.

1
2
3
4
5
#import <foundation foundation.h="">
#import "Tweet.h"
@interface XMLParser : NSObject <nsxmlparserdelegate>
</nsxmlparserdelegate></foundation>

Declare variables for an NSMutableString, NSMutableArray, NSXMLParser and Tweet. Then set the properties for our tweets array and define a loadXMLByURL action.

1
2
3
4
5
6
7
8
9
10
11
12
13
14
15
16
17
18
1
#import <foundation foundation.h="">
#import "Tweet.h"
@interface XMLParser : NSObject <nsxmlparserdelegate>
{
    NSMutableString *currentNodeContent;
    NSMutableArray  *tweets;
    NSXMLParser     *parser;
    Tweet           *currentTweet;
}
@property (readonly, retain) NSMutableArray *tweets;
-(id) loadXMLByURL:(NSString *)urlString;
@end
</nsxmlparserdelegate></foundation>

7.) Open up XMLParser.m. Import our Tweet.h file, synthesize the tweets array and implement our loadXMLByURL action.

1
2
3
4
5
6
7
8
9
10
11
12
13
14
15
16
#import "XMLParser.h"
#import "Tweet.h"
@implementation XMLParser
@synthesize tweets;
-(id) loadXMLByURL:(NSString *)urlString
{
    tweets          = [[NSMutableArray alloc] init];
    NSURL *url      = [NSURL URLWithString:urlString];
    NSData  *data   = [[NSData alloc] initWithContentsOfURL:url];
    parser          = [[NSXMLParser alloc] initWithData:data];
    parser.delegate = self;
    [parser parse];
    return self;
}

We need to release the parser object we created so I am going to do that in a dealloc method that we’ll implement.

1
2
3
4
5
- (void) dealloc
{
    [parser release];
    [super dealloc];
}

8.) There are three methods we need to implement that follow the NSXMLParserDelegate protocol. They are parser:didStartElement:namespaceURI:qualifiedName:attributes, parser:didEndElement:namespaceURI:qualifiedName and parser:foundCharacters.

1
2
3
4
5
6
7
8
9
10
11
12
13
14
15
16
17
18
19
20
21
22
23
24
25
26
27
28
29
30
31
32
- (void) parser:(NSXMLParser *)parser didStartElement:(NSString *)elementname namespaceURI:(NSString *)namespaceURI qualifiedName:(NSString *)qName attributes:(NSDictionary *)attributeDict
{
    if ([elementname isEqualToString:@"status"])
    {
        currentTweet = [Tweet alloc];
    }
}
- (void) parser:(NSXMLParser *)parser didEndElement:(NSString *)elementname namespaceURI:(NSString *)namespaceURI qualifiedName:(NSString *)qName
{
    if ([elementname isEqualToString:@"text"])
    {
        currentTweet.content = currentNodeContent;
    }
    if ([elementname isEqualToString:@"created_at"])
    {
        currentTweet.dateCreated = currentNodeContent;
    }
    if ([elementname isEqualToString:@"status"])
    {
        [tweets addObject:currentTweet];
        [currentTweet release];
        currentTweet = nil;
        [currentNodeContent release];
        currentNodeContent = nil;
    }
}
- (void) parser:(NSXMLParser *)parser foundCharacters:(NSString *)string
{
    currentNodeContent = (NSMutableString *) [string stringByTrimmingCharactersInSet:[NSCharacterSet whitespaceAndNewlineCharacterSet]];
}

I know the element name we are looking for because I have taken a peek at the XML that we will be parsing. If we were parsing a different XML we would need to know the names of the nodes in that XML we wanted to parse.

9.) Open up RootViewController.h. Import XMLParser.h and add our XMLParser and a UIImageView. The UIImageView is really just for cosmetics.

1
2
3
4
5
6
7
8
9
10
11
12
13
14
#import <uikit uikit.h="">
#import "XMLParser.h"
@interface RootViewController : UITableViewController
{
    XMLParser *xmlParser;
    UIImageView *customImage;
}
@property (nonatomic, retain) UIImageView *customImage;
@end
</uikit>

10.) Now open up the implementation file (RootViewController.m). We need to import our Tweet.h file and synthesize our variable. Then in our viewDidLoad method we are going to access my twitter status tweets as XML and load it into our XML Parser. And just because I like to keep things aesthetically pleasing, we’ll set the title to “Tweets”.

1
2
3
4
5
6
7
8
9
10
11
12
13
14
15
16
17
18
19
20
#import "RootViewController.h"
#import "Tweet.h"
@implementation RootViewController
@synthesize customImage;
#pragma mark -
#pragma mark View lifecycle
- (void)viewDidLoad
{
    xmlParser = [[XMLParser alloc] loadXMLByURL:@"http://api.twitter.com/1/statuses/user_timeline/KentFranks.xml"];
    [super viewDidLoad];
    self.title = @"Tweets";
}

11.) Let’s set up our table to display the tweets. I’ve set the number of sections to 1.

1
2
3
4
- (NSInteger)numberOfSectionsInTableView:(UITableView *)tableView
{
    return 1;
}

12.) I’m using the tweets array to set the number of rows in the sections.

1
2
3
4
- (NSInteger)tableView:(UITableView *)tableView numberOfRowsInSection:(NSInteger)section
{
    return [[xmlParser tweets] count];
}

13.) And then all the real work will get done in the tableView:cellForRowAtIndexPath method.

1
2
3
4
5
6
7
8
9
10
11
12
13
14
15
16
17
18
19
20
21
22
23
24
25
26
27
28
29
30
31
32
33
34
- (UITableViewCell *)tableView:(UITableView *)tableView cellForRowAtIndexPath:(NSIndexPath *)indexPath
{
    static NSString *CellIdentifier = @"Cell";
    UITableViewCell *cell = [tableView dequeueReusableCellWithIdentifier:CellIdentifier];
    if (cell == nil) {
        cell = [[[UITableViewCell alloc] initWithStyle:UITableViewCellStyleSubtitle reuseIdentifier:CellIdentifier] autorelease];
    }
    UIImage  *twitterLogo = [[UIImage imageNamed:@"twitter-logo.png"]autorelease];
    Tweet *currentTweet = [[xmlParser tweets] objectAtIndex:indexPath.row];
    CGRect imageFrame = CGRectMake(2, 8, 40, 40);
    self.customImage = [[[UIImageView alloc] initWithFrame:imageFrame] autorelease];
    self.customImage.image = twitterLogo;
    [cell.contentView addSubview:self.customImage];
    CGRect contentFrame = CGRectMake(45, 2, 265, 30);
    UILabel *contentLabel = [[[UILabel alloc] initWithFrame:contentFrame] autorelease];
    contentLabel.numberOfLines = 2;
    contentLabel.font = [UIFont boldSystemFontOfSize:12];
    contentLabel.text = [currentTweet content];
    [cell.contentView addSubview:contentLabel];
    CGRect dateFrame = CGRectMake(45, 40, 265, 10);
    UILabel *dateLabel = [[[UILabel alloc] initWithFrame:dateFrame] autorelease];
    dateLabel.font = [UIFont systemFontOfSize:10];
    dateLabel.text = [currentTweet dateCreated];
    [cell.contentView addSubview:dateLabel];
    return cell;
}

We are setting the current tweet to the object in our tweets array that matches indexPath.row.

1
Tweet *currentTweet = [[xmlParser tweets] objectAtIndex:indexPath.row];

Most of the rest of the code in here is just customizing the look of our cells. I’m not explaining this in detail because I’m assuming if you are mostly interested in parsing the XML. If you want to know more about customizing the table view cells you can take a look at the tutorial.

I have included one graphic in the display that you will need to add to your project “twitter-logo.png”. You can download the graphic from here, and then just right click on Resources and select Add > Existing Files … navigate to where you downloaded the file, then choose to copy the file into your project.

14.) The only other thing I’ve done here is set the height of our rows in the tableView:heightForRowAtIndexPath method. And the release our xmlParser object in dealloc.

1
2
3
4
5
6
7
8
9
10
- (CGFloat)tableView:(UITableView *)tableView heightForRowAtIndexPath:(NSIndexPath *)indexPath
{
    return 55;
}
- (void)dealloc
{
    [xmlParser release];
    [super dealloc];
}

That’s all there is to it. Make sure everything is saved, click Build and Run.

Simulator Shot